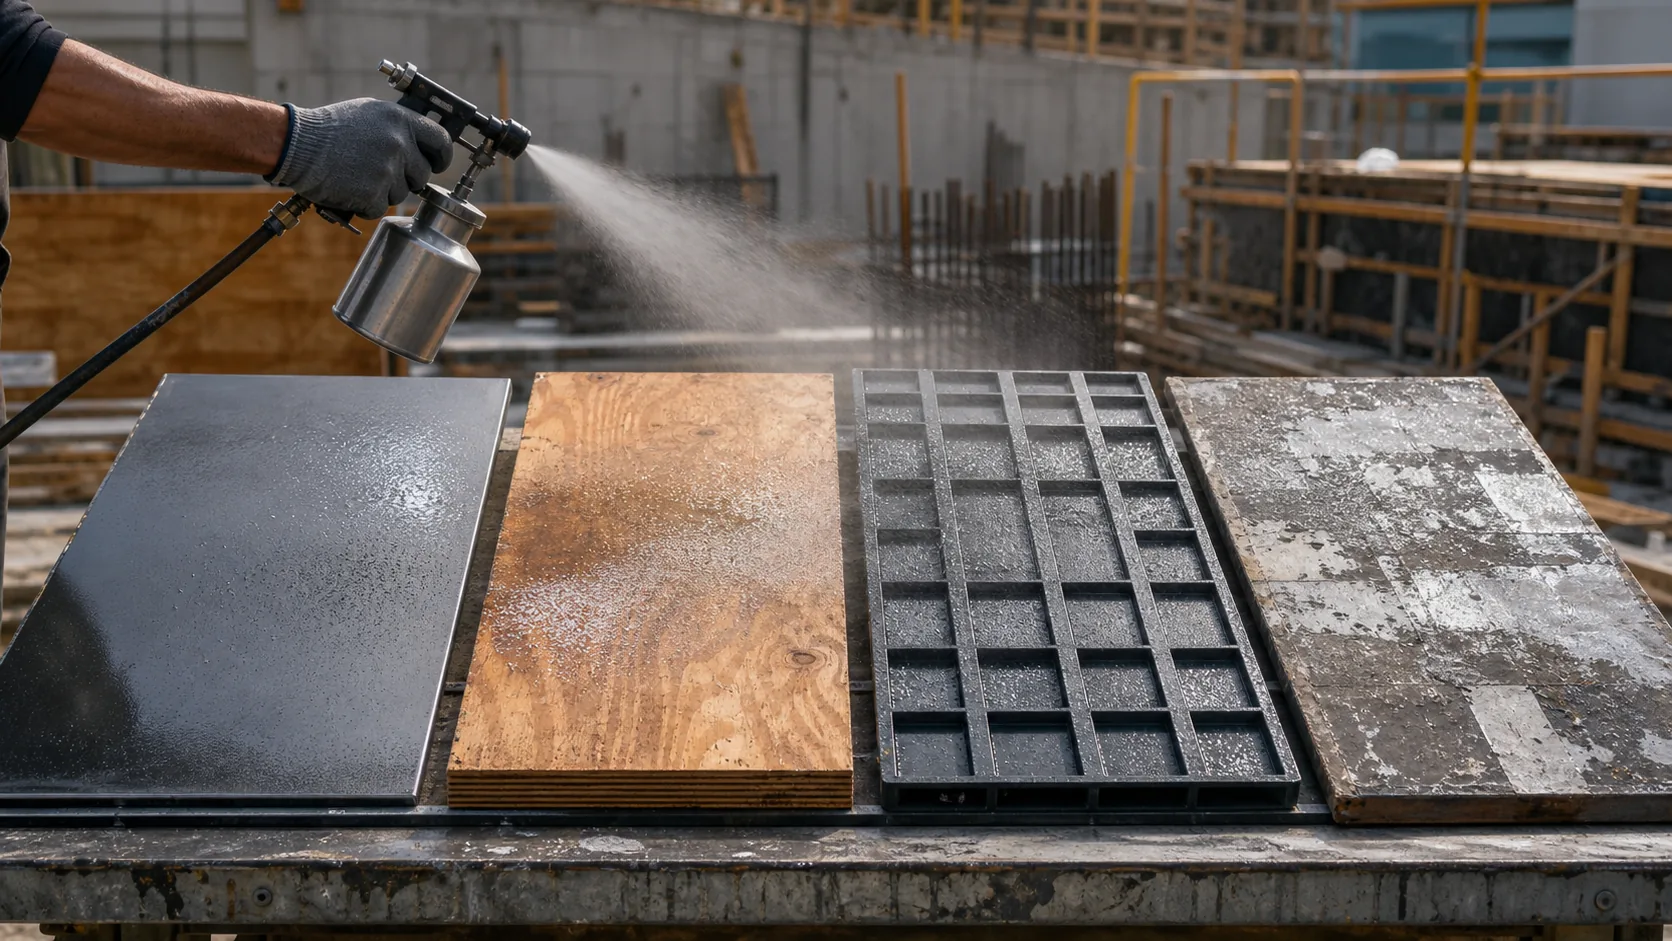
The fastest way to discover a release-agent mismatch is often after the first full pour. By then, the concrete has been placed, the formwork is occupied, and a small compatibility problem can become a large rework problem.
A better approach is to run a controlled mock-up before production casting. The goal is not to prove that a product works in theory. The goal is to see whether the actual release agent, form face, concrete mix, application method, and stripping schedule work together on this project.
This guide pairs well with How to Choose a Release Agent by Formwork Material and Release Agent Application: Spraying, Coverage, and Quality Control.
What the Test Should Answer
A useful compatibility test should give the site team clear answers to four questions:
- Does the concrete separate from the form without sticking, tearing, or excessive force?
- Does the release film leave stains, oily shadows, or visible color variation?
- Does the surface meet the project’s appearance and defect tolerance?
- Can the form face be cleaned and reused without unusual residue or damage?
If the test cannot answer these questions, it is probably changing too many variables at once or recording too little information.
Freeze the Variables Before You Start
Do not treat the mock-up as a product demonstration using ideal conditions. Use the materials and working method that are as close as possible to the actual project.
| Variable | Record before casting |
|---|---|
| Formwork | Material, age, coating, repairs, joints, and previous use |
| Form preparation | Cleaning method, sanding, sealing, and surface condition |
| Release agent | Product name, batch, dilution if applicable, and storage condition |
| Application | Equipment, operator, number of passes, and coverage observations |
| Concrete | Mix reference, slump or workability target, temperature, and delivery timing |
| Placement | Lift height, placement rhythm, vibration method, and stripping plan |
| Weather | Air temperature, form temperature, humidity, and rain or wind exposure |
The purpose is not paperwork for its own sake. If the panel shows a defect, these records help identify which variable needs correction.
Step 1: Choose a Representative Test Panel
The panel should represent the most difficult or most visible part of the project, not the cleanest piece of formwork in the yard.
Include the form material that will actually be used. If the project contains repaired plywood, old steel panels, plastic liners, or mixed form faces, include those high-risk surfaces in the test. Keep joints, corners, tie locations, and repaired zones visible where possible.
For a fair-faced finish, a small vertical panel is often more useful than a flat tray because it reveals how the concrete, air, release film, and vibration interact on a real face.
Step 2: Prepare the Formwork as Production Will Require
Clean the panel using the same site method planned for production. Remove cement paste, dust, rust flakes, old release-agent residue, and loose repair material.
Do not make the mock-up artificially clean if the production process cannot maintain that condition. At the same time, do not use a damaged or contaminated panel and call the resulting failure a product failure. Record the condition before application so the team knows what the test actually represents.
Pay special attention to:
- joints, corners, welds, and edges
- repaired or sanded areas
- changes between old and new panels
- places where water or old residue can collect
Step 3: Apply the Trial Film with the Real Equipment
Use the sprayer, nozzle, pressure, operator, and working sequence planned for the pour. A product that performs well when carefully brushed in a workshop may behave differently when sprayed quickly on a large panel.
Apply a thin, even film according to the product instructions and the project’s application plan. Avoid turning the test into a simple comparison of “more” and “less” product unless film thickness is the specific variable being studied. Too many uncontrolled variations make the result difficult to interpret.
Walk the panel after application. Look for missed edges, puddles, overlap bands, heavy corners, and areas that still look dry. The film should be present without looking like a wet coating.
Step 4: Respect the Actual Waiting and Curing Conditions
Record the time between application and concrete placement. Also record whether the film was allowed to dry, whether the form was exposed to dust or rain, and whether the form temperature changed.
The correct waiting time depends on the release-agent system and the project conditions. Do not assume that a fixed number of minutes will work for every product or weather condition. If the site normally casts within a short window, test that window rather than creating an unrealistic delay.
Step 5: Cast with the Project Mix and Method
Use the concrete mix, delivery rhythm, workability target, placement height, and vibration method that the production team expects to use. Keep the mock-up large enough to show the actual surface behavior, but small enough that the team can inspect it carefully.
Record any deviation from the plan. A change in slump, a long delivery pause, extra water, unusually aggressive vibration, or a cold form can change the result and should not be hidden in the test record.
Step 6: Inspect after Stripping
Inspect both sides of the interface: the concrete surface and the form face. Take photographs from the same distance and lighting direction so the team can compare different panels.
Concrete surface
- Was the form released cleanly, or did the surface tear and pull?
- Are there stains, dark patches, oily shadows, or color differences?
- Are bugholes, pinholes, drag marks, or texture changes concentrated in specific areas?
- Are joints, corners, repairs, and edges acceptable?
- Does the surface match the project’s approved appearance sample?
Formwork surface
- Is there a visible residue film or sticky deposit?
- Is cement paste bonded to the panel?
- Did the release agent pool in corners or leave overlap marks?
- Can the form be cleaned using the planned method?
- Is the panel still suitable for the next use?
A Simple Acceptance Record
Do not reduce the decision to “the concrete came off.” Clean separation is only one part of compatibility. Use a record that combines release, appearance, and formwork condition.
| Check | Result to record |
|---|---|
| Release | Clean, acceptable with minor force, sticking, or surface tearing |
| Color | Uniform, minor variation, visible staining, or unacceptable shadowing |
| Surface defects | Bugholes, pinholes, drag marks, voids, and local texture changes |
| Form residue | None, light residue, heavy residue, or bonded cement paste |
| Reuse condition | Ready for reuse, needs cleaning, needs repair, or reject |
| Decision | Accept, adjust and retest, or reject for this formwork system |
The project team should agree on acceptance criteria before the pour. A mock-up is most useful when the decision is based on a pre-agreed visual standard instead of whoever happens to inspect it first.
How to Read Common Failures
| Observation | Possible causes to review |
|---|---|
| Concrete sticks or tears | Missed film, incompatible surface, dirty form, insufficient curing, or stripping too early |
| Dark or oily shadows | Heavy film, overlap bands, pooling, or unsuitable product for the finish target |
| Defects cluster at repaired areas | Uneven absorption, rough patch, old residue, or local film thickness change |
| Good release but poor color | Product residue, mix variation, wet film, or inconsistent form preparation |
| Form face is difficult to clean | Excess product, cement paste penetration, or a film that does not match the reuse plan |
These are starting points for investigation, not automatic diagnoses. Change one variable at a time where possible, then repeat the panel so the team can see whether the correction actually worked.
A Practical 24-to-48-Hour Workflow
The following schedule is an example for organizing a small test:
- Before application: record the form, concrete, weather, and project acceptance target.
- Application: clean the panel and apply the trial film with production equipment.
- Before casting: inspect coverage and record the waiting time.
- Casting: place and consolidate the concrete using the planned method.
- Stripping: remove the form at the same project-relevant stage and photograph both surfaces.
- Review: compare the result with the acceptance target and decide whether to accept, adjust, or retest.
The timing must follow the actual project cycle. A 24-to-48-hour mock-up schedule is not a universal technical requirement, and it should not override the product instructions, concrete strength requirements, curing plan, or project specification.
Conclusion
A release-agent compatibility test is a small controlled pour that protects a much larger one. It gives the team a chance to check the real form face, application method, concrete mix, weather, and stripping process before the cost of failure becomes high.
Test the system, record the variables, inspect both surfaces, and change one thing at a time. That process produces a more reliable decision than choosing a product from a label or assuming that a result on one formwork material will transfer to another.
For the next step, compare the result with Can Too Much Release Agent Cause Staining on Concrete? and review the concrete release-agent options on the main site.